
Personal website
⏱ This tutorial should take less than 5 minutes.
Hello there, Beginner!
This tutorial walks through setting up a fast, beautiful, custom personal site running on Begin. It uses example code that demonstrates server-side rendering, shared components, and static assets.
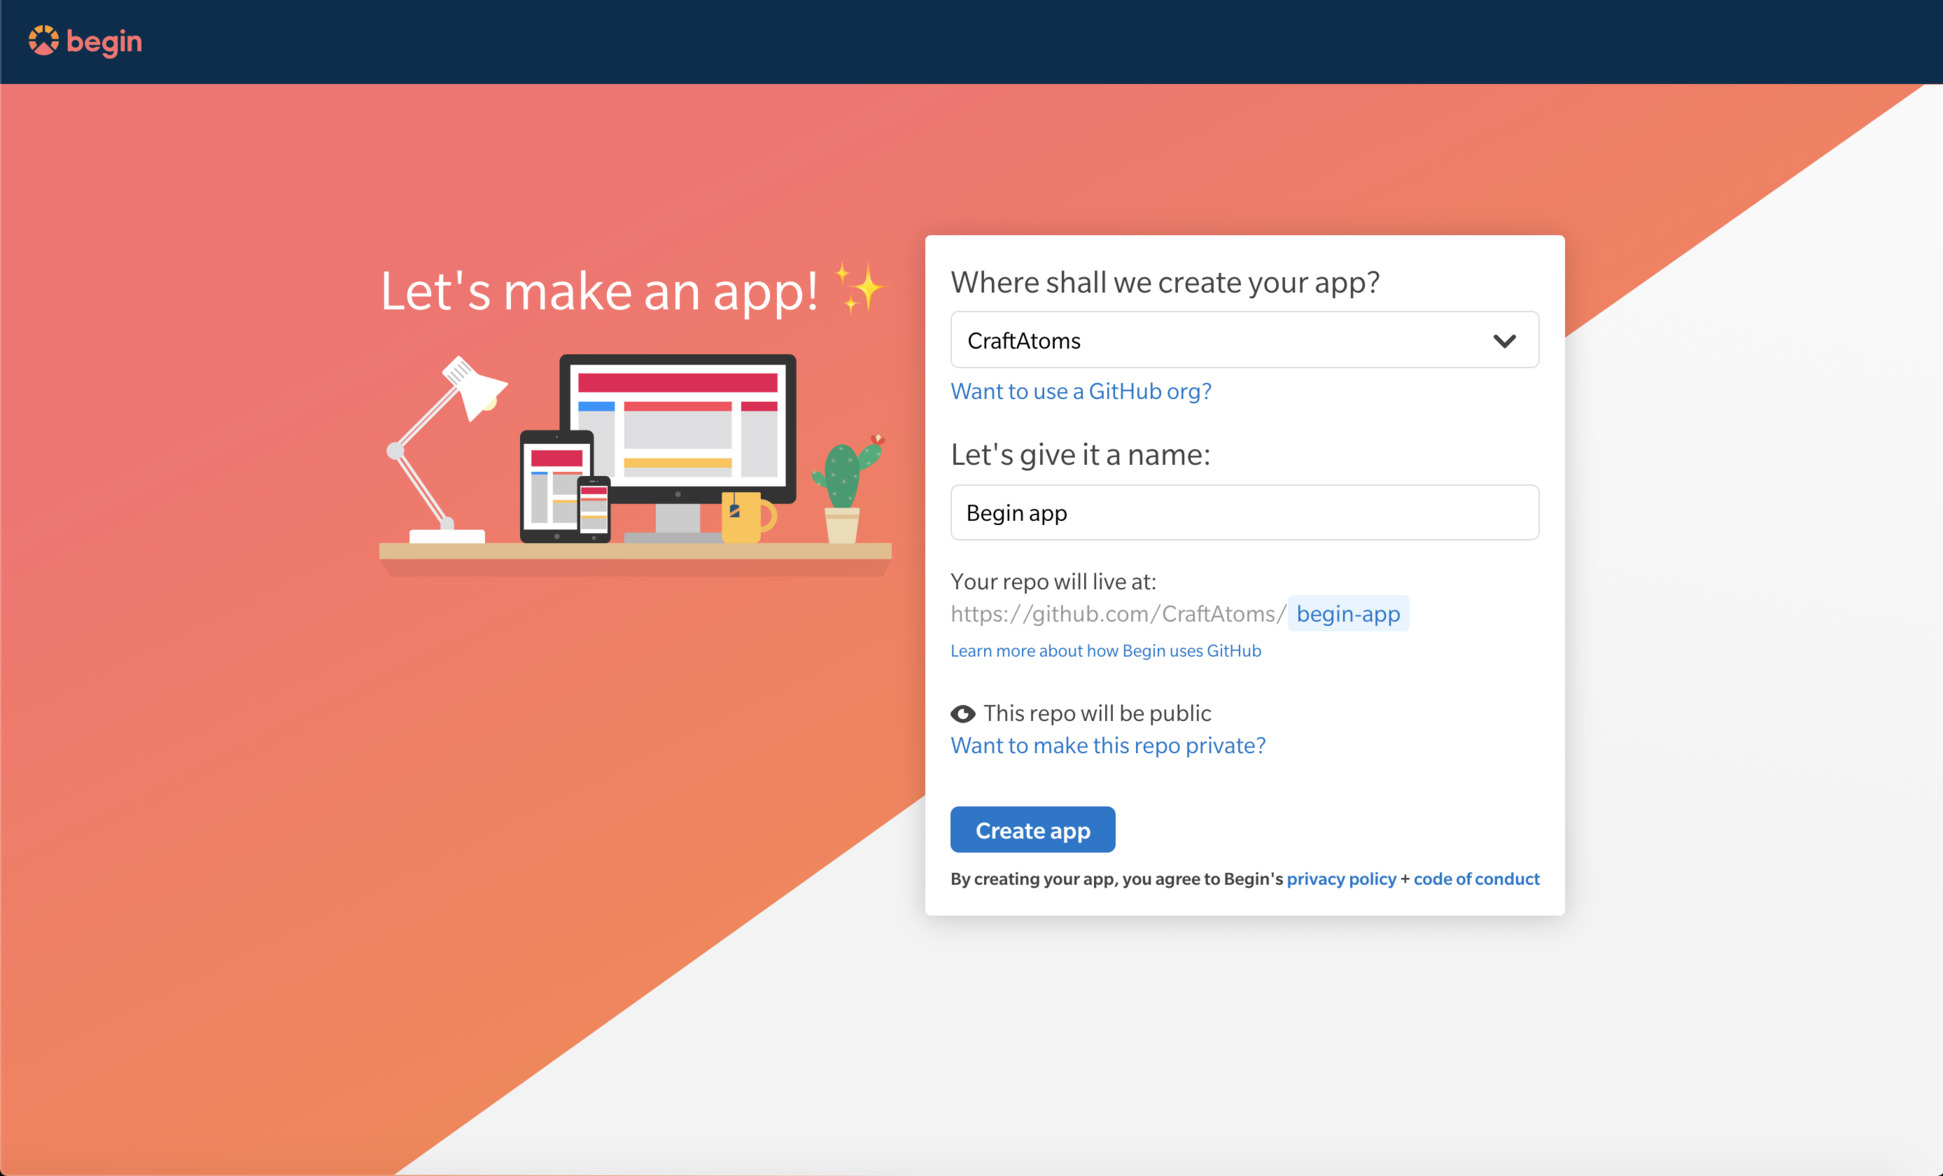
Create your new personal website
Click the Deploy to Begin button below

Next name your app and click the "Create..." button to have Begin create a new app and GitHub repo for it.
Check out your apps' activity feed!
Now click the Staging link in the upper left corner to see your app running in your staging environment.
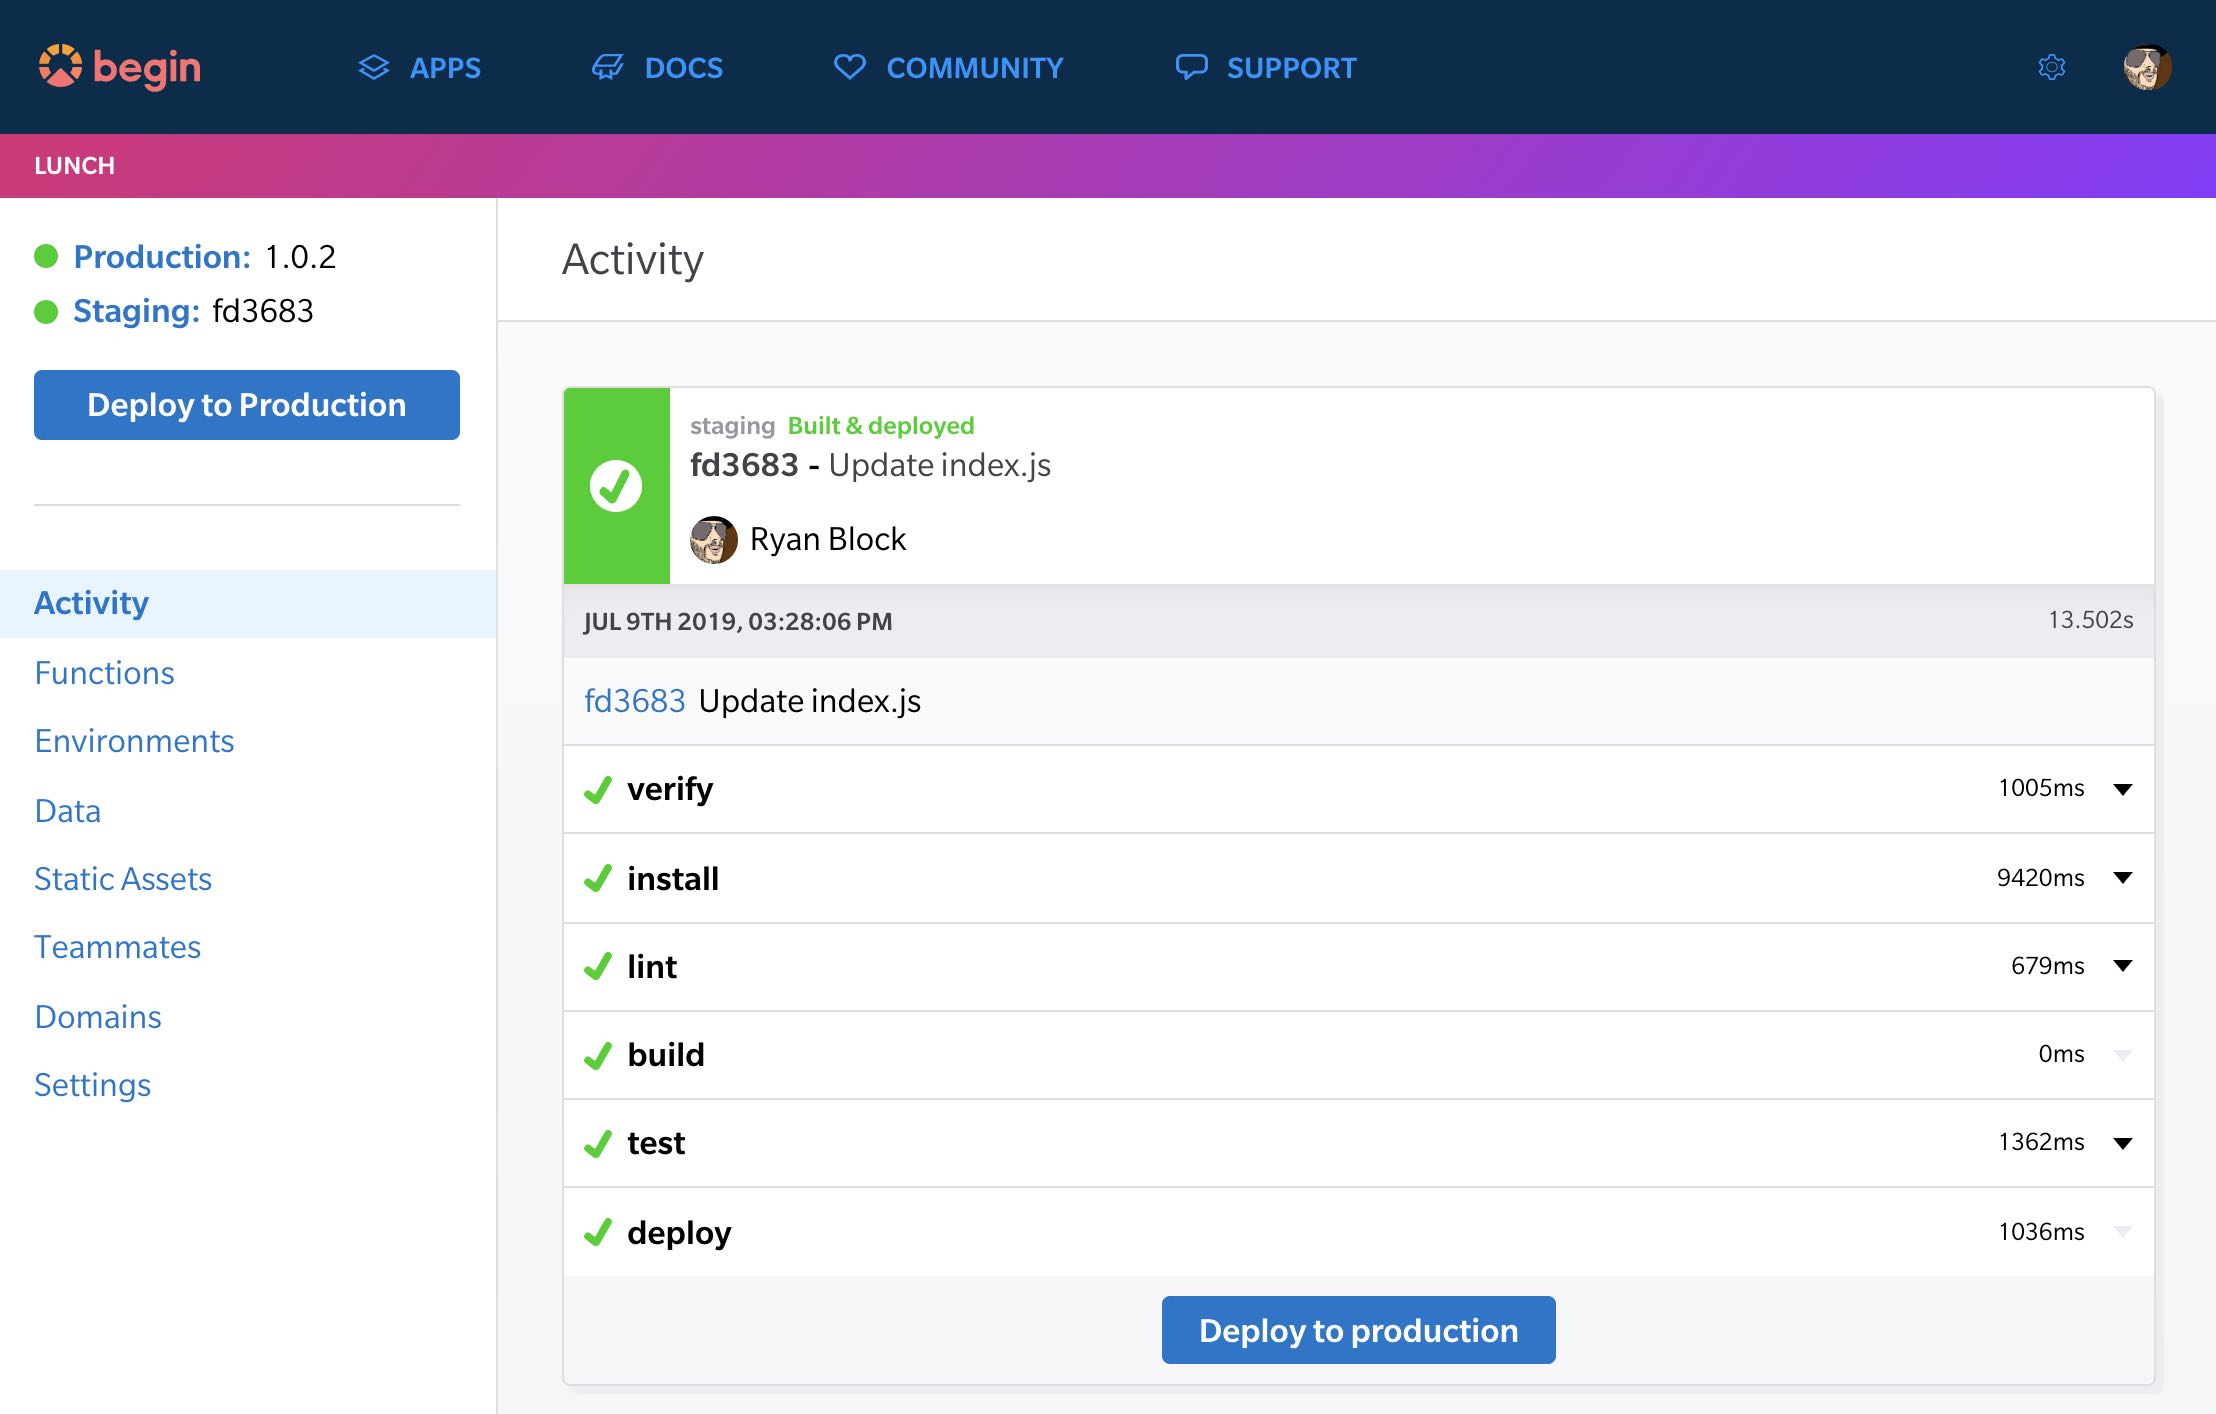
You should see something like the image below:
Nice job!
Now go back to Begin and follow the prompts on the intro cards to see the system in action.
💡 Learn more about CI/CD environments
Project structure
If you followed the intro cards in the activity view you are ready to review your project's structure on your local machine.
.
├── public/
└── src/
    ├── http/
    │   └── get-index/
    └── views/
Let's go over each of these directories and how you may use them:
public/
The public directory where you'll add images (like the background image for your site) and any other static assets or files you want to make publicly accessible in your app.
Each time your app deploys, the contents of this folder will automatically be published to your app's static asset bucket (on S3) as well as Begin's CDN.
Exercise caution! The full contents of this folder will be copied with each deploy, overwriting any existing files with the same name.
src/http/get-index/
The cloud function that handles requests to your site is found at src/http/get-index/.
Some Begin apps are inert static web sites – but not this one. Your personal website is built on a small, fast, individually executing cloud function that handles your HTTP requests and responses. (We call those HTTP functions, for short.)
The HTTP function that handles requests to the root of your app (GET /) is found in src/http/get-index/.
src/views/
By default, the contents of src/views/ gets copied into each of your project's GET HTTP functions (at node_modules/@architect/views for Node, or vendor/views for Ruby and Python) whenever you start the local dev server (or deploy your app).
This means the modules in this folder can be used by any GET HTTP function in your app.
For example, here's how you'd require src/views/main.js:
let layout = require('@architect/views/main')💡 Learn more! Head here to dig deeper into the project structure of Begin apps.
Customize your site
Now for the fun part! Let's customize your personal website and really make it your own.
You've already changed the default name. Now let's add your social media links and change the background image.
As you saw earlier, /src/http/get-index/index.js is a great place to get started updating the content of your site. Open that file in your editor:
Now let's input your social media handles in place of the dummy data. Go ahead and change the values of the email, twitter, linkedin, instagram, and facebook keys – or remove any you don't want to keep.
// src/http/get-index/index.js

const Main = require('@architect/views/main.js')
const staticAssetsHelper = require('./static-assets-helper')

// Customize your site by changing the data below
exports.handler = async function Index () {
  let body = Main({
    /**
     * Basic bio
     */
    fullname: 'Your Name', // ←  Start by adding your name!
    title: 'My personal site!',
    occupation: 'Artist & Photographer',
    location: 'West Glacier, MT',
    bio: 'Lorem ipsum dolor sit amet, consectetur adipiscing elit, sed do eiusmod tempor incididunt ut labore et dolore magna aliqua. Quis ipsum suspendisse ultrices gravida. Risus commodo viverra maecenas accumsan lacus vel facilisis.',

    /**
     * Contact / social
     * - Comment out any item below to remove it from your page
     */
    email: 'your@email.com',
    twitter: 'yourTwitter',
    linkedin: 'your-linkedin-name',
    instagram: 'yourInsta',
    facebook: 'your-facebook-name',

    /**
     * Layout
     */
    photographer: 'Ivana Cajina',
    service: 'Unsplash',
    credit: 'https://unsplash.com/@von_co',
    image: staticAssetsHelper('background.jpg')
    // or link to an external image URL such as ↓
    // image: 'https://images.unsplash.com/photo-1506535772317-9fdb71c959c6'
  })

  return {
    statusCode: 200,
    headers: {
      'content-type': 'text/html; charset=utf8',
      'cache-control': 'no-cache, no-store, must-revalidate, max-age=0, s-maxage=0'
    },
    body
  }
}Now we'll update your background image. Grab a new one Unsplash (or wherever you please) and place it in the public/. Let's name this new image background-2.jpg.
Go back to /src/http/get-index/index.js and replace the current reference to background.jpg with background-2.jpg.
You may notice that your background image is being returned by a module named
staticAssetHelper. This helper demonstrates how to load static assets with the correct URLs locally, in staging, and via the Begin CDN in production.
Ok, let's see the finished product. With your local dev server running (npm start), preview your site.
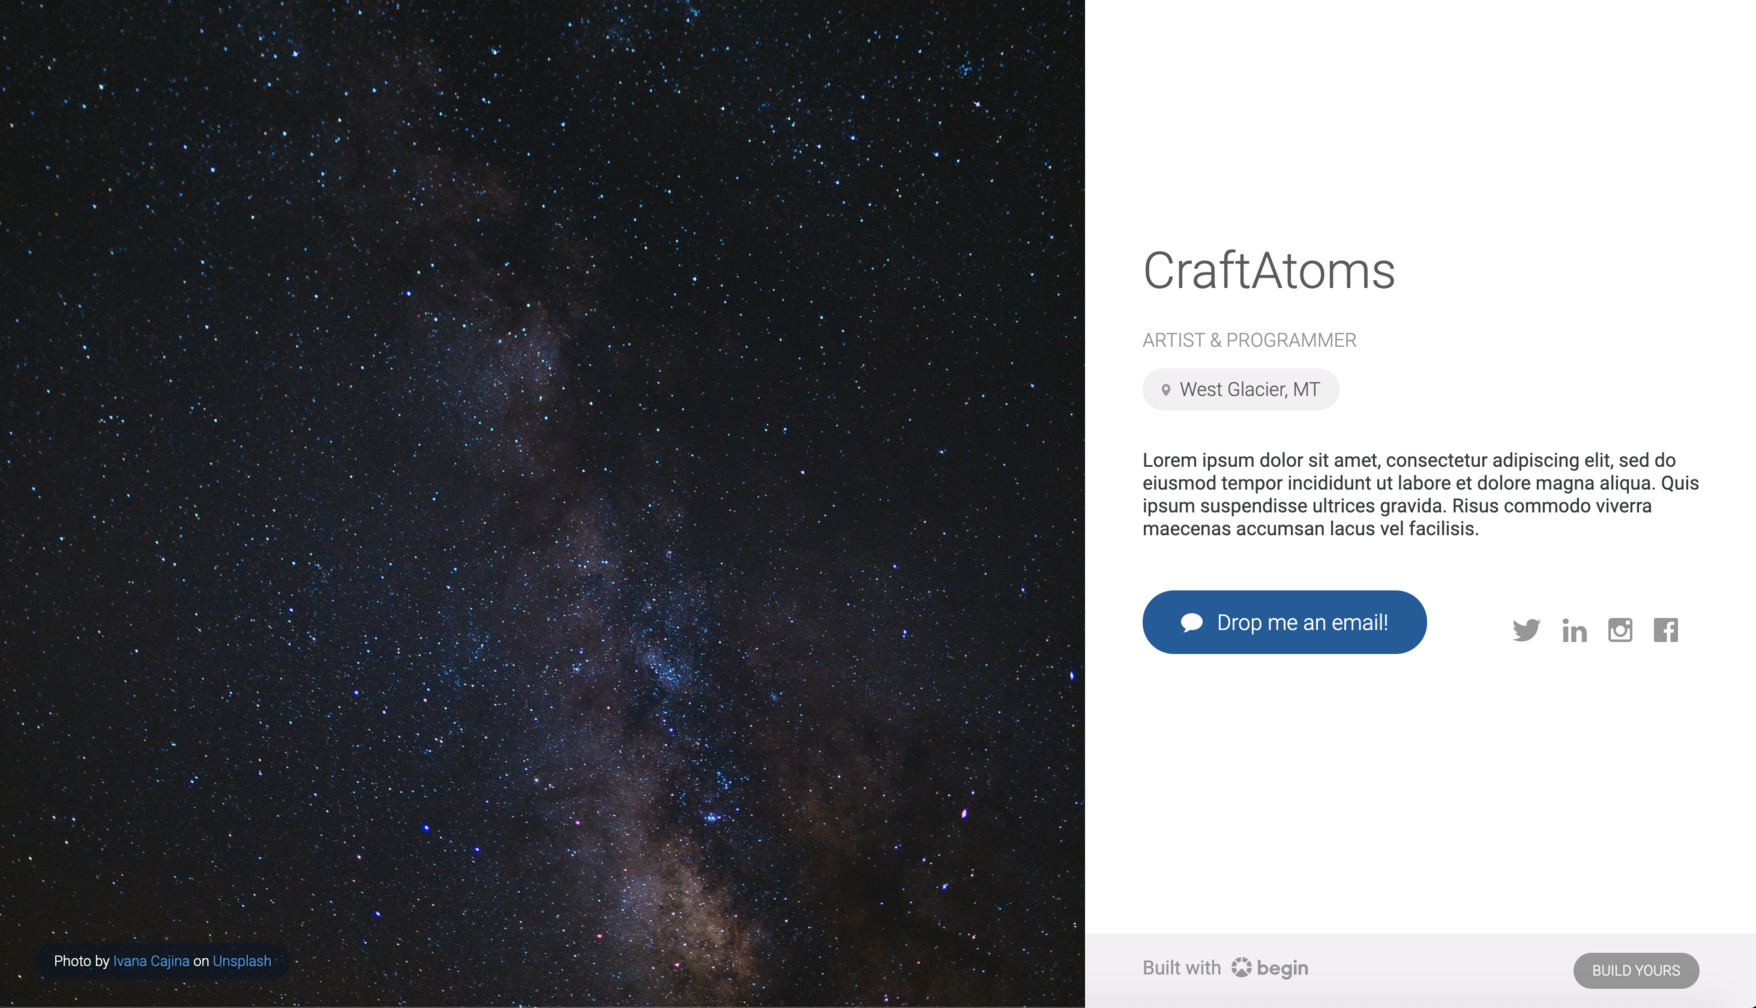
That's one beautiful personal website you've got there – customized to your liking! Time to deploy and show the world what you've just created.
Deploy your site
While not required, it's always a good idea to lint and run tests before pushing just to make sure you catch any errors:
npm run lint
npm t
Everything set? Now let's push this commit (and deploy the build to staging):
git add -A
git commit -am 'Just customizing my Begin site!'
git push origin main
Head on back to Begin and open your staging URL once your build is complete. Looking good? Excellent.
Now let's deploy to production: click the Deploy to production button in the upper left, pick a version, leave an optional message summarizing your changes, and Ship it!
When your next build is done, click the production link in the upper left corner to see the latest release of your app.
✨Tip: You can also deploy to production from your terminal by bumping your npm version (
npm version [patch|minor|major] && git push origin) or by cutting a git tag (git tag -a 1.0.0 -m "1.0, here we come" && git push origin --tags)
Congratulations!
You've now got a shiny new personal website hosted on Begin – nice work.
Now go show it off – people need to see this thing!
Additional resources
- Expand the capabilities of your app:
- Begin reference docs
- Get help:

